Click Here for Camera Tutorials
Manual and Priority Camera Control
When Assigned - With any manual control camera shoot the following types of images to show your understanding of the concepts we explored in class. These galleries should be placed on your photography page. Do not make new webpages for each assignment.
Aperture Control- Depth of Field
Long Exposure with Slow Shutter Speeds
Using manual mode, shoot an example of the effect of long shutter speed on passing traffic at night. Keep the camera completely still with a tripod for this shoot.
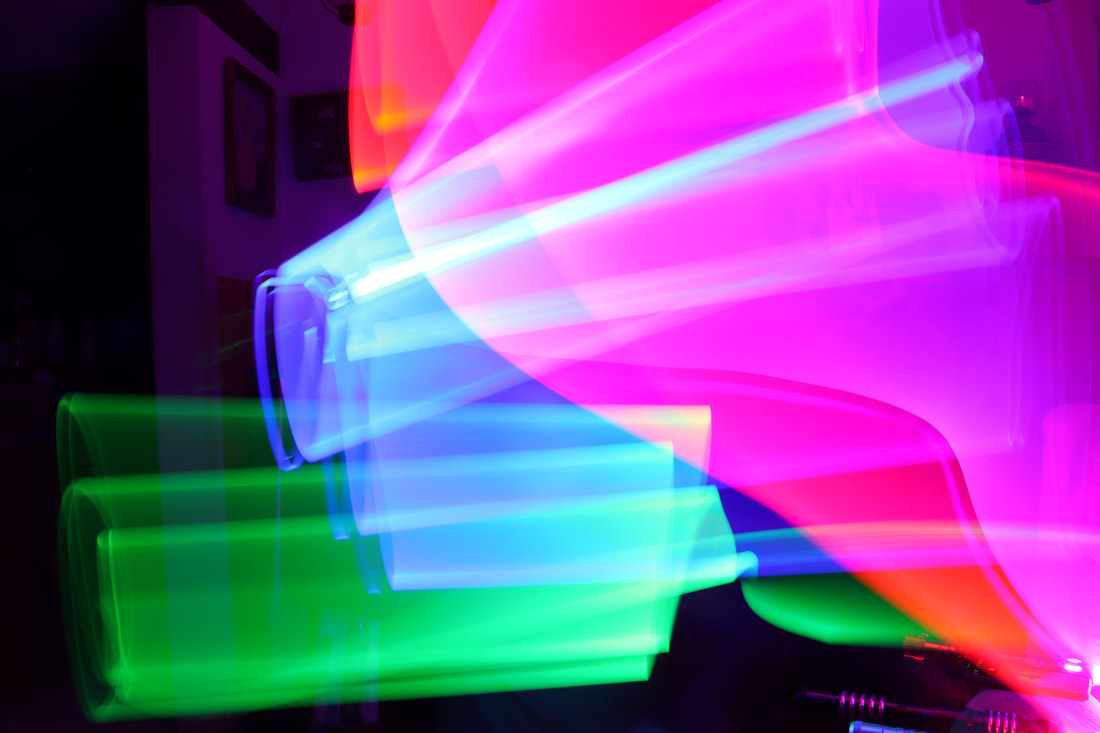
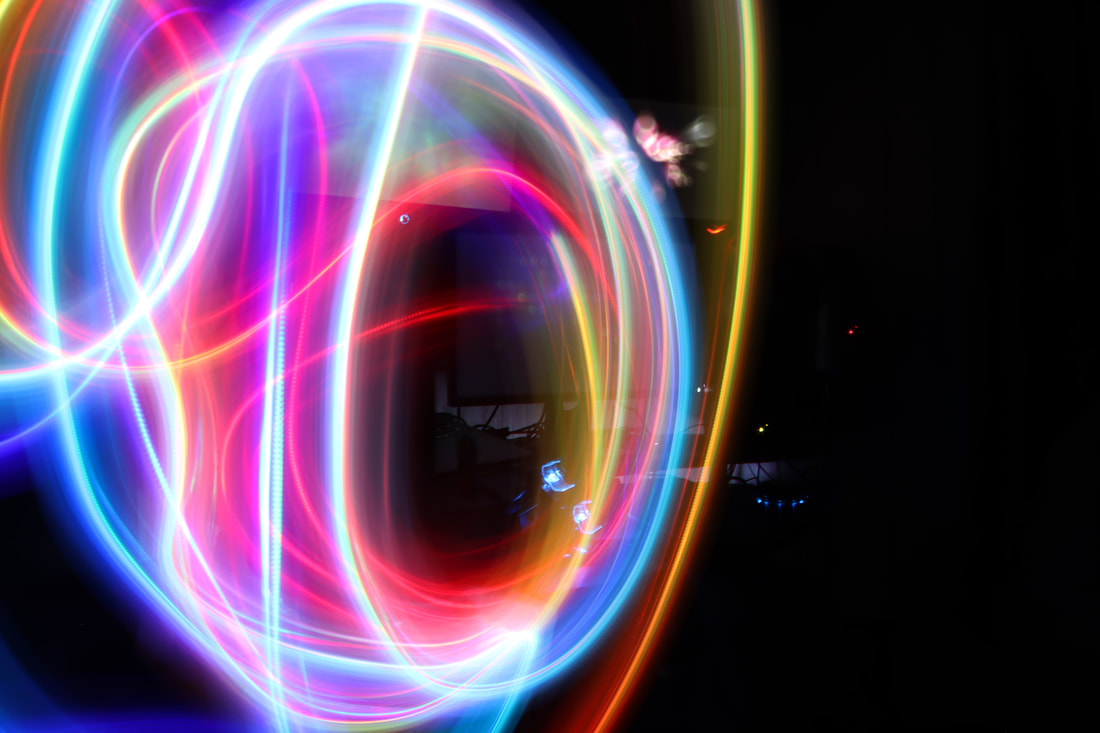
Light Painting Using this Technique
The art of light painting combines camera control and illuminated instruments to essentially paint a subject in color or draw streaks of light by directly shining light into the camera's lens from a distance. Objects can can be painted in various colors of light and 3 dimensional paths of Illumination can envelop the subject.
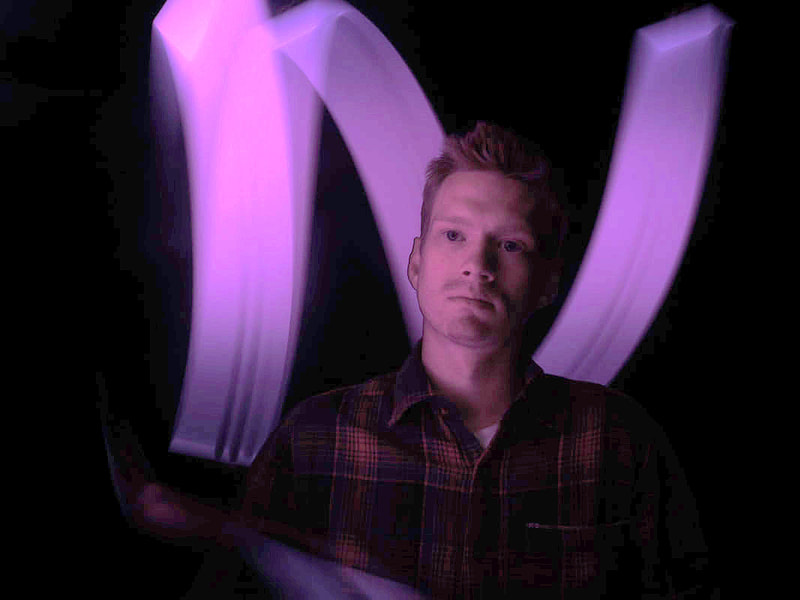

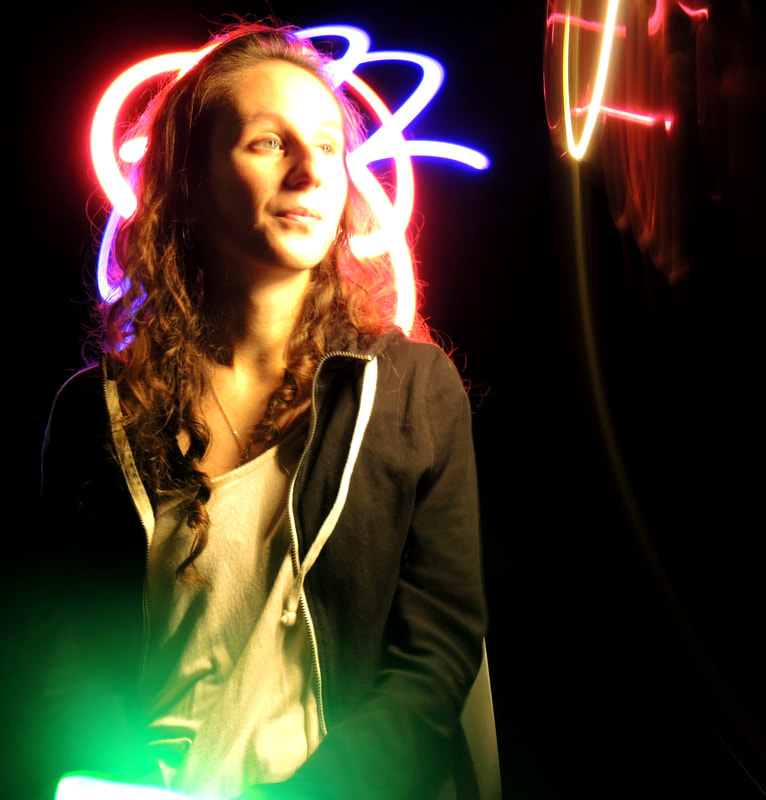
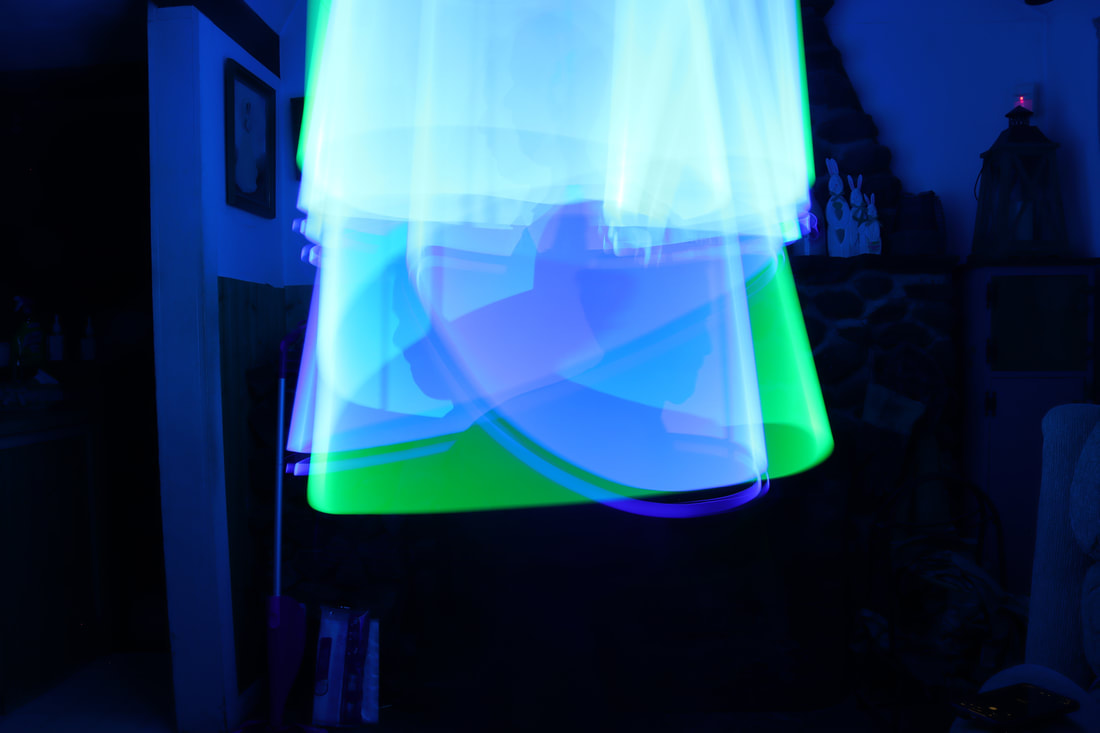
The main camera technique that needs to be mastered is the use of long shutter speeds and aperture control. A low ISO is essential for keeping visual noise out of your images. Depending on the base illumination of your scene you'll probably need several seconds of exposure in the camera. Most manual control cameras allow you to go from 30 seconds to 1.4000th of a second so you'll probably be somewhere in the 4 second range to start. Try a low ISO initially at about 100 or 200.
Typically you can't use one of the priority modes on the camera so you have to be in the manual mode in order to dial in the right settings. It is better to underexpose than to overexpose when doing light painting because overexposed pictures do not get any good color back from tweaking levels in Photoshop. It's much easier to get better results when you push the levels of pixel brightness.
Typically you can't use one of the priority modes on the camera so you have to be in the manual mode in order to dial in the right settings. It is better to underexpose than to overexpose when doing light painting because overexposed pictures do not get any good color back from tweaking levels in Photoshop. It's much easier to get better results when you push the levels of pixel brightness.
Creative Ways to Light Paint
Stop Motion with Short Shutter Speeds (and a lot of light)
Shoot a subject with a high shutter speed to show the ability of a camera to stop time.
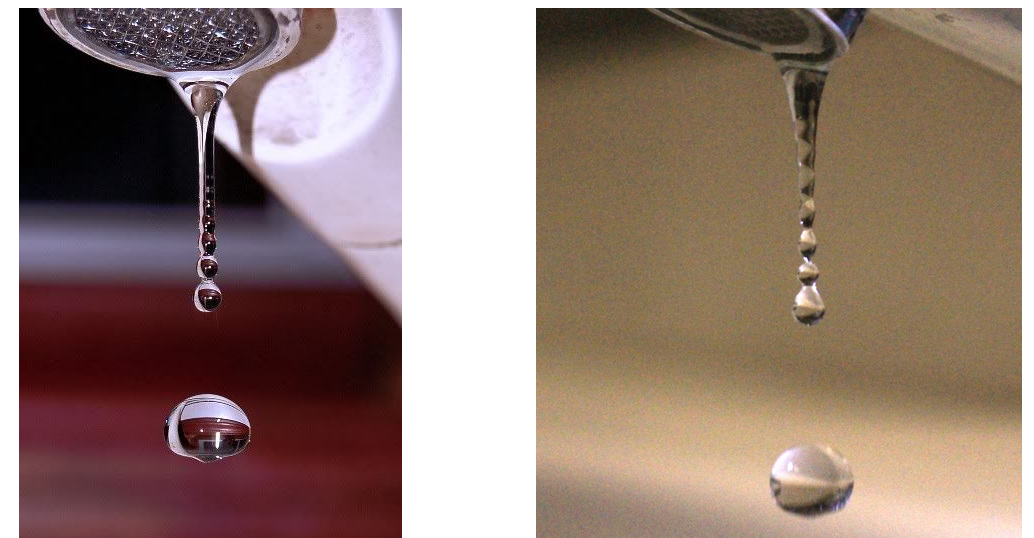
Pro Photo (Left) Student Photo (Right)
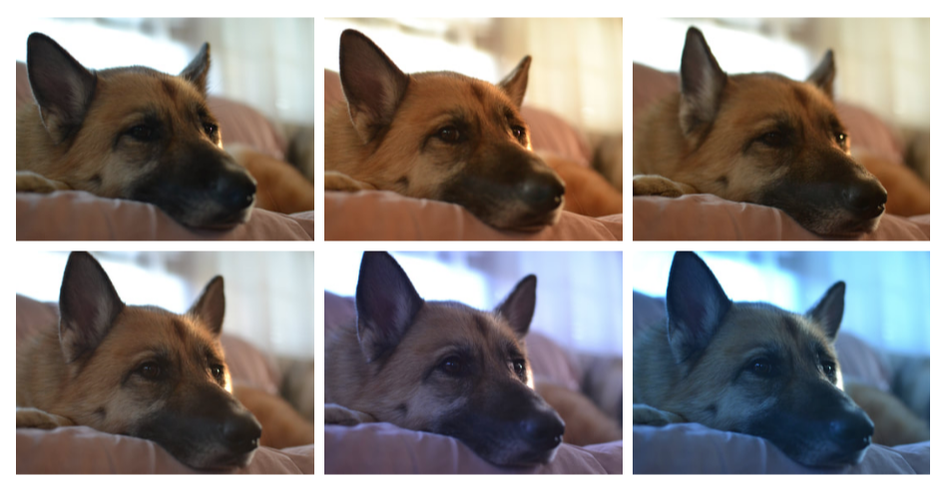
White Balance - What kind of light are you in?
Using the P mode on your DSLR or Mirrorless shoot a series of still photos demonstrating the effect of white balance on a single subject. Label each
image with the setting name. Shoot the 5 presets- AWB / Tungsten (light bulb) / fluorescent, sunlight and shade.
In this example, a dog is lit by a mix of sunlight and some incandescent room light.
image with the setting name. Shoot the 5 presets- AWB / Tungsten (light bulb) / fluorescent, sunlight and shade.
In this example, a dog is lit by a mix of sunlight and some incandescent room light.
Aperture & Shutter Priority Mode
1. When you have completed shooting and editing these images place jpg copies into a gallery or slideshow for each of the above assignments.
LABEL each gallery with the following titles:
APERTURE
SLOW SHUTTER SPEED
FAST SHUTTER SPEED
WHITE BALANCE
LIGHT PAINTING
2. Caption EACH PHOTO with the exposure, aperture, and focal length info. You can cut and paste it from the info file with each picture.
3. Write a "what I learned" summary of each gallery.
FOLLOW THESE INSTRUCTIONS CAREFULLY - GALLERIES THAT ARE NOT LABELLED AND WITHOUT SUMMARIES WILL NOT BE GRADED.
